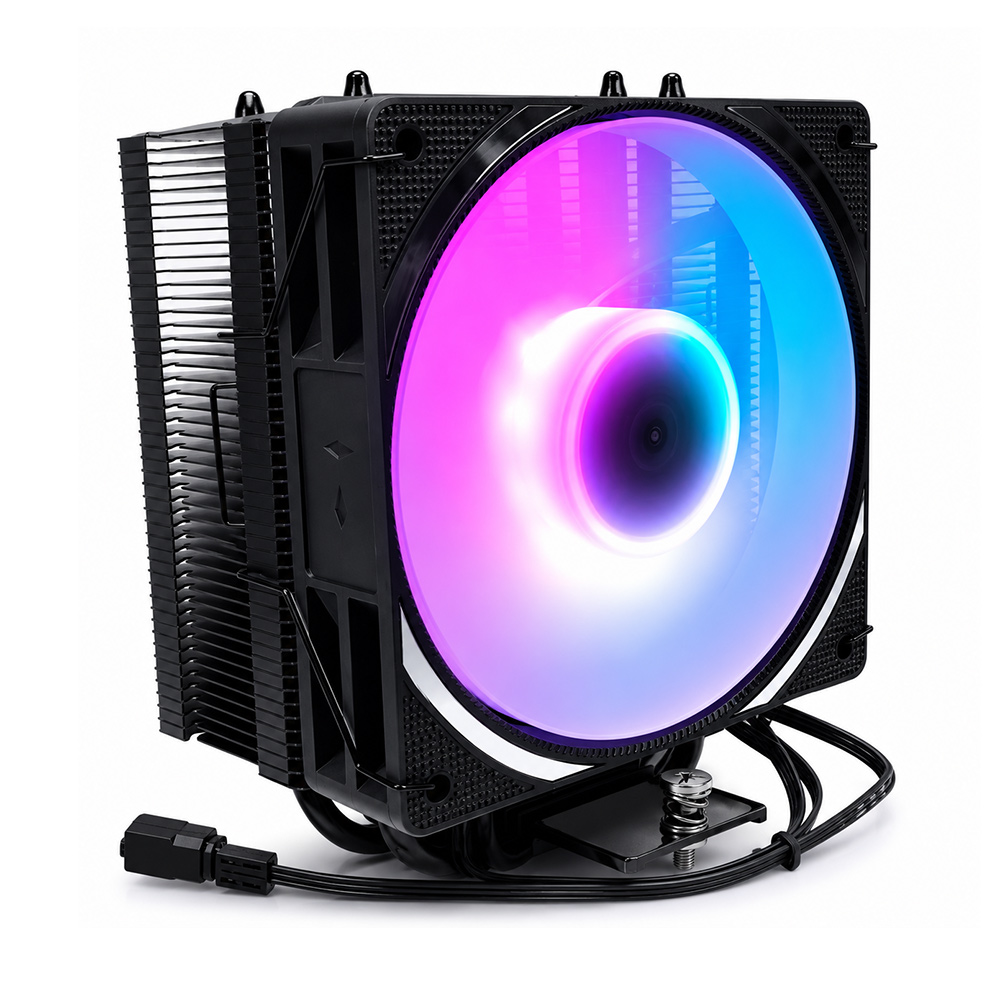

# Step-by-Step Installation Guide for the ATX Cooler 104-0050-2 (with Lighting)
When it comes to maintaining optimal temperatures within your PC, an efficient cooling system is paramount. The **ATX Cooler 104-0050-2**, featuring advanced lighting capabilities, offers a perfect blend of performance and aesthetics for modern builds. Whether you’re upgrading an existing cooling setup or assembling a brand-new rig, this step-by-step guide will walk you through the installation process to ensure smooth operation and visually stunning illumination.
---
## Table of Contents
1. Introduction to the ATX Cooler 104-0050-2
2. Preparing Your Workspace
3. Required Tools and Materials
4. Understanding the Components
5. Step-by-Step Installation Process
6. Connecting the Lighting System
7. Final Checks and Testing
8. Troubleshooting Common Issues
9. Maintenance Tips for Longevity
---
## 1. Introduction to the ATX Cooler 104-0050-2
The ATX Cooler 104-0050-2 is designed to provide reliable cooling for ATX form-factor motherboards, featuring customizable RGB lighting that enhances your computer’s visual appeal. This cooler combines efficient heat dissipation with quiet operation, making it an ideal choice for gamers, content creators, and professionals alike.
Key features include:
- High-performance fan blades optimized for airflow.
- Integrated RGB lighting compatible with major motherboard software.
- Durable construction with a sleek design.
- Easy-to-install mounting system.
---
## 2. Preparing Your Workspace
Before beginning the installation, it’s important to prepare a clean, static-free workspace to protect your PC components from damage.
- **Reset your environment**: Clear all unnecessary items from your desk.
- Ensure you have sufficient lighting to see delicate connectors and screws.
- Use an anti-static wrist strap or frequently ground yourself by touching a metal part of your PC case to avoid electrostatic discharge (ESD).
- Arrange your tools and components within easy reach.
---
## 3. Required Tools and Materials
Gather the following tools and materials prior to installation:
- Phillips-head screwdriver (magnetic tip recommended)
- Thermal paste (if not pre-applied)
- Isopropyl alcohol and lint-free cloth (for cleaning CPU surface)
- The ATX Cooler 104-0050-2 unit with mounting hardware
- Power cables for fan and lighting (usually included)
- User manual for reference
---
## 4. Understanding the Components
The ATX Cooler 104-0050-2 package typically includes:
- Cooling fan with attached heatsink
- RGB lighting strip integrated into the fan frame
- Mounting brackets compatible with standard ATX sockets
- Screws and installation clips
- Power cables for fan and lighting control
Understanding each component’s role helps facilitate a smoother installation. The **heatsink** absorbs heat from the CPU, while the **fan** expels hot air away from the processor. The **lighting system** adds aesthetic value and can be synchronized with your motherboard’s RGB control software.
---
## 5. Step-by-Step Installation Process
### Step 1: Power Down and Open Your Case
Turn off your PC completely and unplug all cables. Open the case by removing the side panel, usually secured with thumb screws or regular screws.
### Step 2: Remove Existing Cooler (If Upgrading)
If replacing an old cooler, carefully disconnect its power cable and unscrew its mounting hardware. Gently twist the cooler to break the thermal paste seal and lift it off.
### Step 3: Clean the CPU Surface
Use isopropyl alcohol and a lint-free cloth to remove old thermal paste residue from the CPU surface. Ensure the area is dry before proceeding.
### Step 4: Apply Thermal Paste
If your ATX Cooler does not come with pre-applied thermal paste, apply a pea-sized amount of thermal paste on the center of the CPU. This ensures proper heat conduction between the CPU and heatsink.
### Step 5: Attach Mounting Brackets to the Motherboard
Depending on your motherboard socket type, attach the included mounting brackets securely around the CPU socket. Refer to your cooler’s manual for exact orientation.
### Step 6: Position the Cooler
Align the heatsink base over the CPU, ensuring it contacts the thermal paste evenly. Press down gently but firmly.
### Step 7: Secure the Cooler
Use the screws and mounting clips to fasten the cooler to the motherboard. Tighten screws diagonally in small increments to maintain even pressure.
### Step 8: Connect the Fan Power Cable
Locate the CPU fan header on the motherboard (usually labeled “CPU_FAN”) and connect the cooler’s fan cable.
---
## 6. Connecting the Lighting System
The ATX Cooler 104-0050-2 comes equipped with RGB lighting that requires connection to your motherboard or an external controller.
### Step 1: Identify RGB Headers
Locate the 4-pin or 3-pin RGB headers on your motherboard designed for LED strips or fans.
### Step 2: Connect RGB Cable
Plug the cooler’s RGB cable into the appropriate RGB header. Ensure alignment of pins to avoid damage.
### Step 3: Configure Lighting Software
Power on your system after all connections are secured. Install or open your motherboard manufacturer’s RGB software (such as ASUS Aura Sync, MSI Mystic Light, or Gigabyte RGB Fusion) to customize lighting colors, patterns, and synchronization across devices.
---
## 7. Final Checks and Testing
- Confirm all cables are connected properly and secured.
- Ensure no wires interfere with the fan blades.
- Close your PC case and reconnect power cables.
- Power on your system and observe fan spinning and lighting functionality.
- Monitor CPU temperatures using software like HWMonitor or Core Temp to confirm effective cooling.
---
## 8. Troubleshooting Common Issues
**Fan Not Spinning:**
Check the fan cable connection to the CPU fan header. Verify BIOS settings to ensure fan headers are enabled.
**RGB Lighting Not Working:**
Ensure RGB cable is plugged into the correct header. Check motherboard RGB software for device detection and update drivers if necessary.
**High CPU Temperatures:**
Recheck thermal paste application and cooler seating. Make sure fan is oriented correctly for optimal airflow.
---
## 9. Maintenance Tips for Longevity
- Regularly check and clean dust build-up on the fan blades and heatsink fins.
- Update motherboard firmware and RGB software to maintain compatibility.
- Periodically reapply thermal paste every 1-2 years to maintain thermal efficiency.
- Ensure your PC case has adequate ventilation to complement your cooler’s performance.
---
## Conclusion
Installing the **ATX Cooler 104-0050-2 (with Lighting)** is a straightforward process when approached methodically. Following this detailed guide will help you achieve superior cooling performance paired with customizable lighting effects, enhancing both the functionality and aesthetics of your PC build. Proper installation and maintenance ensure your system runs cooler, quieter, and more reliably — making the investment worthwhile for any serious PC enthusiast.
---
### Additional Notes on Styling Your Installation (CSS Inspired Concepts)
While this guide focuses on the physical installation, consider organizing your workspace and documentation with clear structure akin to web design principles:
- Use a **page wrapper** concept to keep all elements cleanly contained.
- Implement **margin** and **padding** ideas by spacing your tools and components neatly.
- Maintain consistent **font-family** and clear **color schemes** (e.g., dark text #111 on soft backgrounds #f4f8ff) to reduce eye strain during long installation sessions.
- Use **box-sizing** awareness when managing cables and hardware placement to maximize efficient use of space.
- Think of your PC’s internal airflow like a **hero section** with a background (#eaf2ff) that keeps the environment cool and responsive.
By applying both technical and organizational best practices, your ATX Cooler installation will be a success from start to finish.
---
Thank you for reading this comprehensive guide. For further questions or support, refer to the official ATX Cooler documentation or contact customer service. Happy building!