
# Step-by-Step Installation Guide for the 3U Server Heatsink Model 107-0033-1
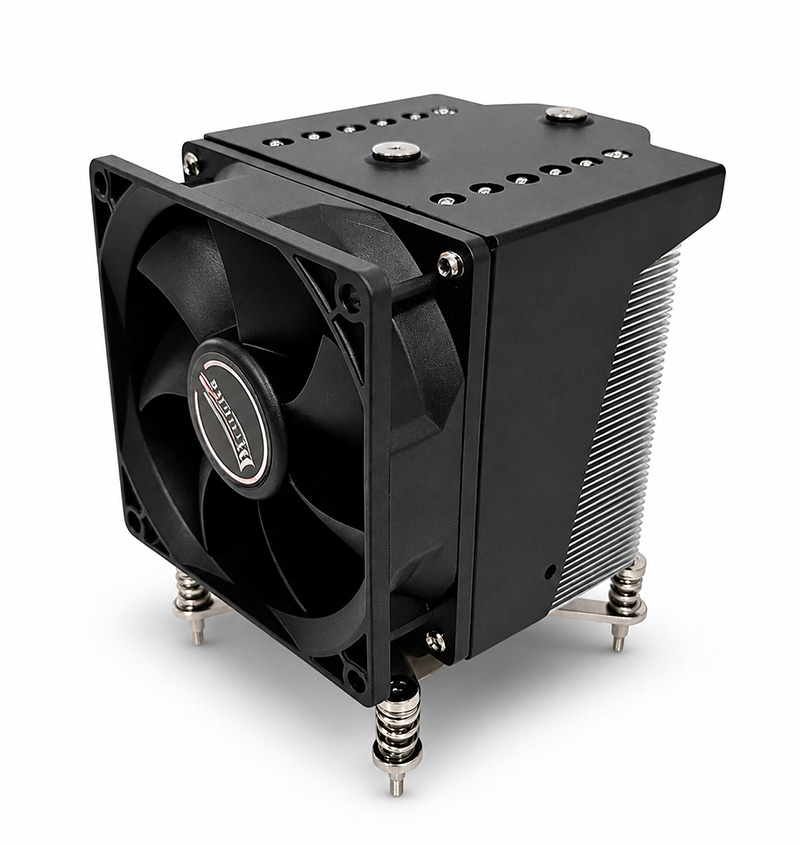
In today’s data-driven world, maintaining optimal thermal management within server racks is crucial to ensuring consistent performance and longevity of hardware components. The 3U Server Heatsink Model 107-0033-1 is designed to effectively dissipate heat in high-density server environments. Proper installation is key to harnessing its full potential, preventing thermal throttling, and avoiding costly downtime.
This detailed guide provides a comprehensive, step-by-step walkthrough on how to install the 3U Server Heatsink Model 107-0033-1. Whether you are a seasoned IT professional or a systems integrator, this article will offer clear instructions, helpful tips, and essential considerations to streamline your installation process.
---
## Table of Contents
1. Introduction to the 3U Server Heatsink Model 107-0033-1
2. Tools and Materials Required
3. Pre-Installation Preparations
4. Step 1: Power Down and Secure the Server
5. Step 2: Remove Existing Cooling Components
6. Step 3: Prepare the Server CPU and Socket
7. Step 4: Install the 3U Server Heatsink
8. Step 5: Connect and Verify Airflow Components
9. Step 6: Reassemble and Perform System Checks
10. Maintenance Tips for Optimal Performance
11. Conclusion
---
## 1. Introduction to the 3U Server Heatsink Model 107-0033-1
The 3U Server Heatsink Model 107-0033-1 is engineered for servers housed in 3U rack units, offering superior thermal conductivity and efficient heat dissipation. Its design focuses on maximizing airflow and reducing thermal resistance, which is vital for high-performance CPUs operating under heavy computational loads.
Key features include:
- High-quality aluminum fins with optimized surface area
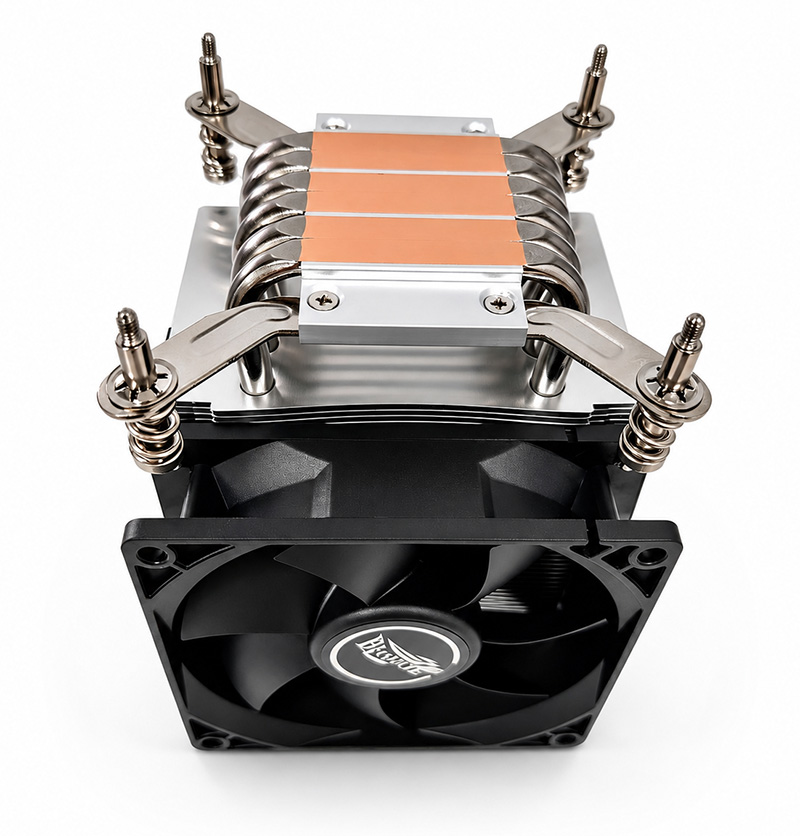
- Copper baseplate for enhanced heat transfer
- Compatibility with standard 3U server CPUs and sockets
- Easy-to-install mounting brackets
- Designed to minimize noise while maximizing cooling efficiency
Before beginning the installation, it is important to familiarize yourself with the server chassis and the heatsink’s components to ensure a smooth workflow.
---
## 2. Tools and Materials Required
To ensure a successful installation, gather the following tools and materials:
- Anti-static wrist strap (to prevent ESD damage)
- Phillips-head screwdriver
- Thermal paste or thermal interface material (TIM)
- Isopropyl alcohol (70% or higher) and lint-free cloth for cleaning
- Compressed air canister for dust removal
- The 3U Server Heatsink Model 107-0033-1 package with mounting hardware
- User manual or datasheet for reference
Having these at hand will help avoid unnecessary delays during the installation process.
---
## 3. Pre-Installation Preparations
### Reset Your Work Environment
Begin by resetting your workstation to a clean, static-free environment. Remove any unnecessary items from your desk and ensure that the workspace is organized. This minimizes the risk of losing small parts like screws or brackets.
### Set Up Your Page Wrapper: Organizing the Workspace
Think of your workstation as a “page wrapper” where the entire installation process will occur. Just as in web design, where a page wrapper controls layout and margins to create a clean presentation, keeping your workspace neat with defined areas for tools, components, and documentation will improve efficiency and reduce errors.
---
## 4. Step 1: Power Down and Secure the Server
Safety first. Ensure the server is completely powered down and unplugged from all power sources. Remove any connected peripherals and network cables.
**Pro Tip:** Use the `reset` feature on the server BIOS if necessary to prevent residual power flow before proceeding.
Place the server on a stable surface with sufficient lighting. Engage anti-static precautions by wearing a wrist strap and grounding yourself.
---
## 5. Step 2: Remove Existing Cooling Components
Identify the existing cooling solution attached to the CPU. This may be a stock heatsink or an older aftermarket cooler.
- Remove any screws or clips securing the old heatsink.
- Gently twist and lift the heatsink off the CPU. Avoid pulling vertically without twisting to prevent CPU socket damage.
- Use compressed air to clear dust from the socket area and surrounding components.
During this step, pay attention to the server’s internal layout, including the placement of cables and airflow paths, as these will influence the new heatsink’s installation.
---
## 6. Step 3: Prepare the Server CPU and Socket
Before installing the new heatsink, thoroughly clean the CPU surface:
- Use isopropyl alcohol on a lint-free cloth to remove old thermal paste residue.
- Allow the surface to dry completely.
- Inspect the CPU for any bent pins or damage.
Correct preparation ensures optimal contact between the CPU and the heatsink baseplate, enhancing heat transfer.
---
## 7. Step 4: Install the 3U Server Heatsink
### Applying Thermal Paste
Apply a small, pea-sized amount of thermal paste directly onto the center of the CPU. The paste fills microscopic gaps between the CPU and the heatsink, improving thermal conductivity.
### Positioning the Heatsink
Carefully align the heatsink over the CPU socket:
- Ensure the mounting brackets align with the server’s retention mechanism.
- Slowly lower the heatsink straight down to avoid smearing the thermal paste excessively.
### Securing the Heatsink
Using the included screws or clips:
- Tighten the mounting hardware in a cross-pattern to apply even pressure. This prevents uneven seating that could lead to hotspots.
- Avoid overtightening to prevent damaging the motherboard or CPU socket.
---
## 8. Step 5: Connect and Verify Airflow Components
The 3U Server Heatsink Model 107-0033-1 relies on proper airflow to function efficiently.
- Connect any required fan headers to the motherboard’s CPU fan connectors.
- Verify that the heatsink’s orientation aligns with the server’s airflow direction, typically front-to-back.
- Inspect cable management to ensure no wires obstruct airflow over the heatsink fins.
Consider the server’s background color and ambient lighting—similar to how a well-designed hero section uses background (#eaf2ff) and border-bottom styling (#dbe7ff) to improve aesthetics and usability, a clean airflow path enhances thermal performance and system reliability.
---
## 9. Step 6: Reassemble and Perform System Checks
Once the heatsink is installed:
- Replace the server cover and secure it properly.
- Reconnect power and peripheral cables.
- Power on the server and enter BIOS or use monitoring software to check CPU temperature and fan speeds.
Monitor for proper operation and listen for unusual noises indicating fan or heatsink issues.
---
## 10. Maintenance Tips for Optimal Performance
To maintain peak cooling performance:
- Regularly reset and clean server internals to prevent dust accumulation.
- Check the heatsink’s mounting hardware periodically to ensure it remains tight.
- Replace thermal paste every 1-2 years or as recommended.
- Use tools that respect the server’s margin and padding — metaphorically, maintain spatial allowances around components for airflow and heat dissipation.
---
## Conclusion
Installing the 3U Server Heatsink Model 107-0033-1 is a critical task that, when done correctly, significantly improves server thermal management. Following this step-by-step guide ensures a professional, safe, and effective installation.
Remember, just as web developers use CSS properties like `box-sizing`, `font-family`, and `overflow-x hidden` to control layout and user experience, system integrators must manage physical space, component compatibility, and airflow to optimize server performance.
By adhering to best practices and paying close attention to detail, your servers will remain cool, reliable, and ready to meet demanding workloads for years to come.