
# How to Maintain and Clean Your 3U Server Heatsink 107-0033-1 for Optimal Performance
Maintaining optimal thermal performance is critical to ensuring the longevity and reliability of your server hardware. Among various components, the **3U Server Heatsink 107-0033-1** plays a pivotal role in dissipating heat generated by the CPU and other high-performance components. Without proper care, dust, grime, and poor maintenance can severely degrade its efficiency, leading to overheating, throttling, or even hardware failure.
In this comprehensive guide, we will explore the best practices for maintaining and cleaning your 3U Server Heatsink 107-0033-1, ensuring that it performs at its peak. We will also touch on general server maintenance principles relevant to IT professionals and data center managers. Let’s dive in.
---
## Understanding the Importance of the 3U Server Heatsink 107-0033-1
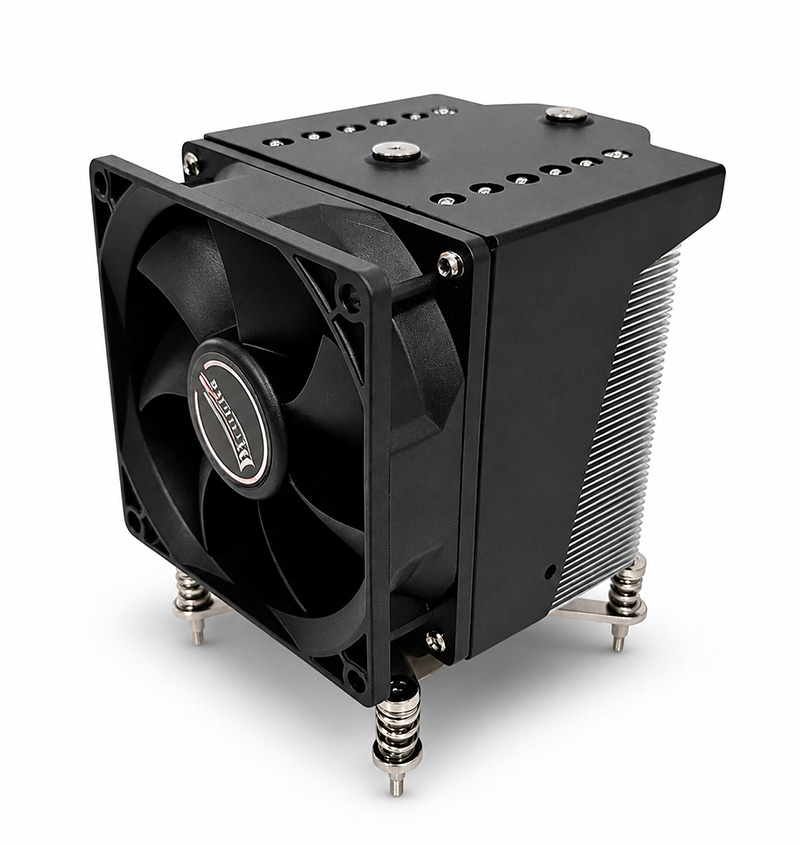
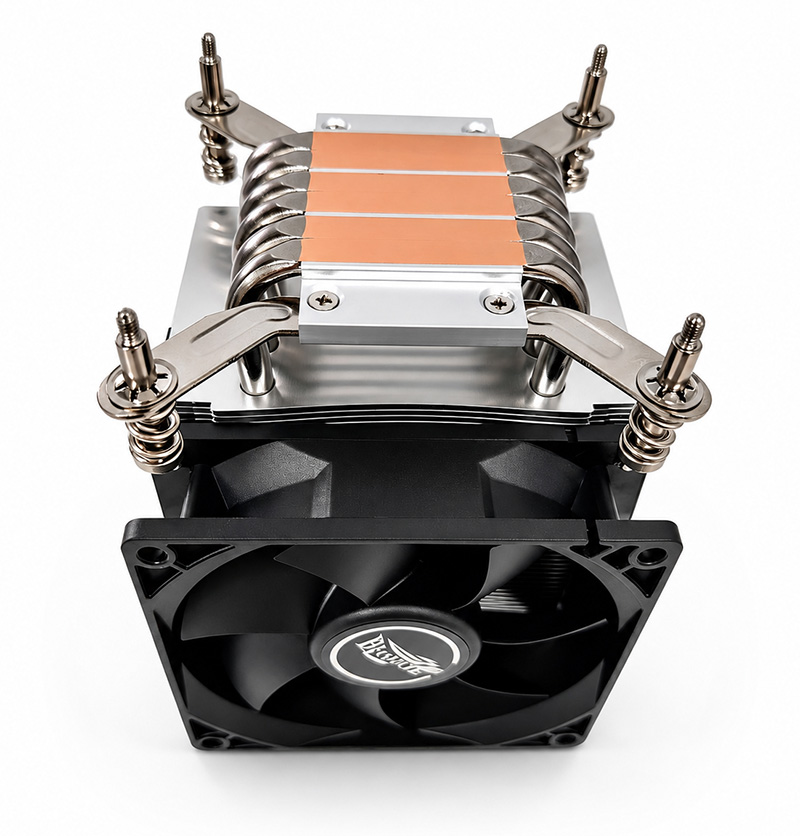
The **3U Server Heatsink 107-0033-1** is designed to fit within a 3U rack server chassis, typically used in enterprise environments that demand high-density and powerful computing. It serves as a passive cooling solution, relying on conduction and convection to transfer heat away from the processor.
Key reasons why maintaining this heatsink is essential:
- **Thermal Efficiency:** Dust accumulation and debris reduce heat dissipation efficiency.
- **Prevent Throttling:** Overheated CPUs throttle down to prevent damage, reducing server performance.
- **Hardware Longevity:** Excessive heat accelerates wear and tear.
- **System Stability:** Proper cooling prevents unexpected shutdowns and crashes.
---
## Preparing for Maintenance: Tools and Safety Precautions
Before you start cleaning or maintaining your heatsink, prepare the following tools:
- Anti-static wrist strap (to prevent ESD damage)
- Compressed air canister or an air compressor with a blower nozzle
- Soft-bristle brush (e.g., a small paintbrush or electronics cleaning brush)
- Isopropyl alcohol (90% or above) and lint-free cloths or microfiber wipes
- Screwdrivers suited for your server chassis
- Thermal paste (for reapplying after heatsink removal)
### Safety First
- Power down the server completely and unplug it from the power source.
- Ground yourself using an anti-static wrist strap.
- Work in a clean, dust-free environment to prevent further contamination.
- Refer to your server’s maintenance manual for any model-specific precautions.
---
## Step-by-Step Guide to Cleaning the 3U Server Heatsink 107-0033-1
### 1. Accessing the Heatsink
Most 3U servers have a standardized layout, but always consult your specific server documentation. Typically, you will:
- Open the server chassis by removing screws or releasing latches.
- Identify the heatsink, which is usually a large metal block with fins located atop the CPU.
- Disconnect any fan connectors if the heatsink includes an active cooling fan.
### 2. Removing the Heatsink (if necessary)
For deep cleaning or thermal paste replacement:
- Unscrew the heatsink mounting screws carefully.
- Gently twist and lift the heatsink off the CPU.
- Avoid touching the CPU pins or socket to prevent damage.
### 3. Cleaning Dust and Debris
#### Using Compressed Air
- Hold the heatsink firmly to avoid dropping it.
- Use short bursts of compressed air to blow dust from between the fins.
- Blow air from multiple angles to dislodge stubborn particles.
- Avoid spinning the fan blades (if attached) excessively to prevent damage.
#### Using a Soft Brush
- For dust that compressed air cannot remove, gently brush the fins.
- Brush along the fin direction to avoid bending.
- Clean the entire surface area including the base plate.
### 4. Cleaning Thermal Paste Residue
If you removed the heatsink:
- Use a lint-free cloth lightly moistened with isopropyl alcohol to wipe off old thermal paste from the base of the heatsink and the CPU surface.
- Ensure both surfaces are completely clean and dry before reapplying thermal paste.
### 5. Reapplying Thermal Paste
- Apply a small pea-sized amount of high-quality thermal paste to the center of the CPU.
- Avoid spreading the paste manually; the pressure from the heatsink will spread it evenly.
- This ensures optimal thermal conductivity between the CPU and heatsink.
### 6. Reinstalling the Heatsink
- Carefully place the heatsink back onto the CPU.
- Tighten mounting screws diagonally and evenly to ensure proper contact pressure.
- Reconnect any fan cables if applicable.
### 7. Final Cleaning and Inspection
- Check for loose cables or debris inside the chassis.
- Wipe down accessible surfaces with a damp microfiber cloth.
- Close the chassis securely.
---
## Additional Tips for Maintaining Optimal Server Cooling
### Regular Cleaning Schedule
Dust accumulation is inevitable in many data centers or office environments. Establish a cleaning schedule based on your environment:
- High dust environments: every 3-6 months.
- Controlled clean rooms: every 6-12 months.
### Monitor Temperature and Performance
Use server management software to monitor CPU temperatures and fan speeds. Sudden temperature spikes can indicate clogged heatsinks or failing fans.
### Managing Airflow and Ambient Conditions
- Maintain positive airflow inside the server rack.
- Ensure adequate space around the server chassis for ventilation.
- Keep ambient room temperature within recommended ranges (usually 18-27°C).
### Software and Firmware Updates
Sometimes thermal issues may relate to firmware controlling fan speeds or CPU performance. Keeping firmware up to date ensures optimal thermal management.
---
## The Role of CSS Concepts in Server Management Interfaces (Bonus Insight)
While not directly related to physical heatsink maintenance, understanding some CSS (Cascading Style Sheets) concepts can be useful if you are managing server interfaces or dashboards. Many server management consoles use web-based UIs where CSS properties affect usability and readability.
Some key CSS terms include:
- **Reset, Margin, Padding, and Box-Sizing:** These define how elements are spaced and sized on the page, ensuring consistent layouts across browsers.
- **Font-Family and Font Smoothing:** Critical for legible text on monitoring dashboards.
- **Page Wrapper and Container with Max-Width:** Help structure content within fixed widths for readability.
- **Background Color (#f4f8ff) and Color (#111):** Define the visual theme, contributing to eye comfort during prolonged monitoring.
- **Overflow-X Hidden:** Prevents horizontal scroll bars caused by content overflow.
- **Section Padding and Border-Bottom:** Used to organize content into distinguishable sections with borders for clarity.
Though these technical details are tangential, they contribute to creating user-friendly management tools that help you monitor server health, including temperatures and fan speeds – crucial for assessing heatsink performance indirectly.
---
## Conclusion
Proper maintenance and cleaning of your **3U Server Heatsink 107-0033-1** are vital steps toward maximizing server uptime and performance. Neglecting heatsink care risks overheating, hardware degradation, and costly downtime.
By following the detailed cleaning procedures outlined above—preparing tools safely, removing and cleaning the heatsink correctly, reapplying thermal paste, and reinstalling carefully—you ensure your server remains cool under load. Additionally, establishing a regular maintenance routine and closely monitoring server temperatures will help preempt thermal issues.
Remember, a well-maintained heatsink not only protects your investment but also helps maintain the efficiency and reliability of your entire data center infrastructure.
---
*For more detailed information, refer to your specific server model’s maintenance documentation or consult with hardware specialists.*